
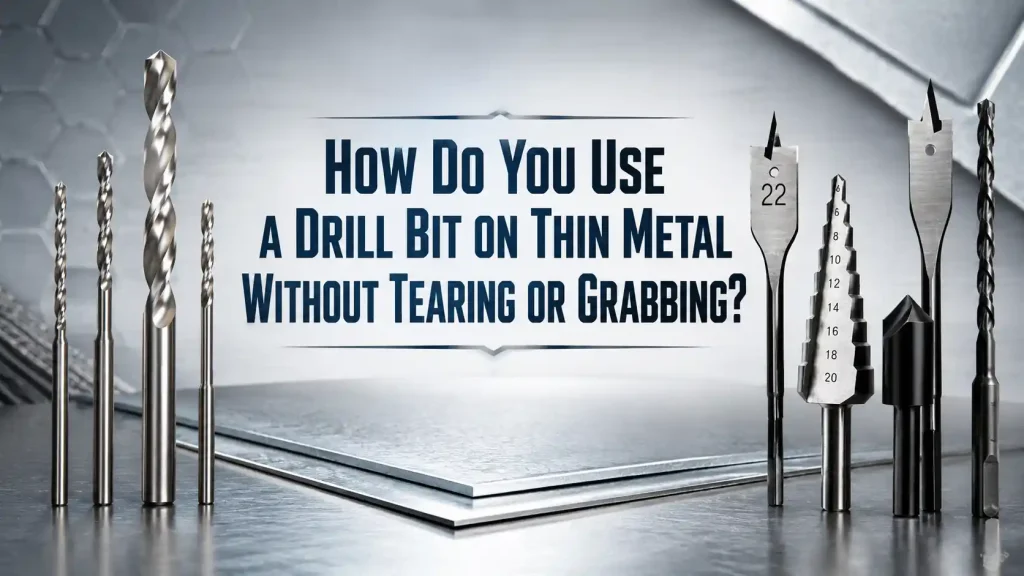
Thin metal is unforgiving. A small sheet can look easy until the bit catches, the edge tears, the hole turns triangular, or the workpiece twists under the drill. The problem is rarely just strength. A Drill Bit works well on thin metal only when the sheet is supported, the point starts accurately, the speed is controlled, and the exit side is protected from sudden grabbing.
For maintenance teams, installers, fabricators, and workshop buyers, the practical goal is simple: make a clean hole without bending the panel or creating a burr that cuts hands, wiring, gaskets, or paint. The right method matters as much as the tool. Even a sharp bit can snag when the sheet flexes. A worn bit can overheat and work-harden stainless steel. A large bit can pull itself through the final fraction of metal and leave a torn lip.
This guide focuses on real decisions around thin mild steel, aluminum sheet, electrical boxes, brackets, duct panels, and light stainless work. It explains how to set up the material, start the hole, choose speed and pressure, and decide when a pilot hole, step bit, backing board, or clamp changes the result.
A Drill Bit should be treated as part of a drilling setup, not as the whole setup. On thin metal, the same tool can make a clean round hole or a torn edge depending on support, speed, point condition, and breakthrough control.

Why Thin Metal Tears Instead of Cutting Cleanly
A thick plate supports the cutting edge for longer. Thin metal does not. As soon as the point breaks through, the last small ring of material can flex upward. If the cutting edge is aggressive, the Drill Bit grabs the sheet instead of shaving it. That grab can twist the part, enlarge the hole, or leave a raised burr that needs extra finishing.
The second cause is poor support. A loose sheet vibrates like a small spring. Each vibration changes the cutting pressure. The bit may chatter, skip, or catch at the exit. Clamping the sheet flat to a backing board often improves the hole more than changing drill brands.
The third cause is heat. Heat softens some materials, hardens others, and dulls the cutting edge. A dull point then needs more pressure, which creates more heat and more grabbing. Aluminum may load the flutes with sticky chips. Stainless can become harder at the surface when rubbed instead of cut. A clean hole depends on cutting, not polishing.
A Drill Bit that rubs instead of cutting is already moving toward a poor result. Once the edge gets hot or loaded with chips, thin metal becomes harder to control at the exact moment the operator needs precision.
Start With the Material and Hole Size
Before choosing a tool, identify the sheet and the hole size. Mild steel, aluminum, galvanized sheet, and stainless do not behave the same way. Aluminum is easy to cut but can clog flutes. Stainless needs a sharp edge, lower speed, and steady pressure. Thin galvanized sheet can tear if the work flexes. Painted panels need edge control so the coating does not chip more than necessary.
Small holes can often be made with a standard twist Drill Bit. Larger holes in thin metal may be cleaner with a step bit because each step removes material gradually and reduces the final catch. Very large openings may require a hole saw, punch, or knockout tool, but that is a different job. For this topic, the main concern is how to make common screw, rivet, cable, pilot, and mounting holes with control.
A Drill Bit for this work should be chosen after the hole size and material are known. A small pilot hole in mild steel, a cable clearance hole in aluminum, and a fastening hole in stainless may need different speed and feed habits.
Table 1. Thin Metal Drilling Setup Choices
| Situation | Practical setup | Reason |
|---|---|---|
| Small screw or rivet hole | Center mark, clamp, sharp twist bit | The hole is small enough that a clean point can cut without heavy grabbing. |
| Medium mounting hole | Pilot hole, then final size or step bit | Gradual cutting lowers exit-side tearing. |
| Painted electrical box | Masking tape, center punch, backing block | The surface mark is easier to protect and the sheet is supported. |
| Aluminum sheet | Moderate speed, chip clearing, light lubricant if suitable | Aluminum chips can pack into the flutes. |
| Thin stainless | Low speed, firm feed, sharp bit, cutting fluid where acceptable | Rubbing can heat and harden the surface. |
| Curved or loose panel | Clamp to a flat support before drilling | Flexing makes the bit catch at breakthrough. |
This setup table is useful because it turns a vague drilling problem into a short checklist. If the sheet cannot be clamped, the risk of grabbing rises. If the hole is large, a pilot step is safer. If the material is stainless, rubbing should be avoided.
A Drill Bit performs more predictably when these conditions are set before drilling starts. The table is a reminder to fix the workholding and method before blaming the material.
Mark the Hole So the Point Does Not Wander
Thin sheet often comes with smooth paint, zinc coating, or oily film. The point can skate before it begins cutting. A wandering start creates an oval hole or pushes the operator to add side pressure, which makes the final result worse. A sharp center punch, automatic punch, or small dimple helps the Drill Bit start where intended.
For delicate painted parts, use a light center mark and tape if the finish matters. Tape will not make a weak setup strong, but it helps visibility and can reduce small scratches around the start. On slippery stainless, a stronger center mark may be needed because the point has little time to center itself before the sheet flexes.
A Drill Bit starts more cleanly when the mark is visible, centered, and deep enough to guide the point without distorting the panel.
Pilot holes also help. A small pilot hole reduces the force needed by the final size. The pilot should be straight, centered, and not so large that the next size has no material to guide it. If the finished hole must be accurate, step up gradually instead of jumping from a tiny pilot to a large final diameter.
A Drill Bit used for the pilot should be sharp enough to cut on center without heavy pressure. A poor pilot hole simply transfers the error to the final size.

Clamp the Sheet and Support the Exit Side
Support is the quiet part of clean drilling. Place the sheet on a flat backing board, scrap wood, or suitable sacrificial support. Clamp it close to the hole, not only at the far edge. The support reduces vibration and gives the Drill Bit something stable to enter as it breaks through the metal.
Without support, the sheet may lift into the flutes. That is when the bit pulls suddenly and tears the edge. With support, the exit side is held flatter, so the cutting edge finishes the circle instead of folding the metal. The difference can be dramatic on thin aluminum, junction box covers, HVAC panels, and small brackets.
A Drill Bit is much less likely to grab when the exit side stays flat. Backing support gives the cutting edge a cleaner finish and keeps the sheet from climbing into the flutes.
Do not hold a small sheet by hand. If a bit catches, the part can spin. Gloves may protect from sharp edges, but they can also be caught by rotating tools. Use clamps, a vise, or a fixture that keeps hands away from the rotating bit and the sheet edge.
Choose Speed and Pressure for Cutting, Not Rubbing
Speed depends on material and diameter. Smaller bits can run faster than large bits. Stainless and larger holes usually need lower speed. Aluminum often tolerates more speed but still needs chip clearing. The key is to produce chips, not smoke, squealing, or polished circles.
Too much speed overheats the edge. Too little pressure lets the bit rub. Too much pressure flexes the sheet and increases breakthrough grab. A good feel is steady, controlled feed with visible chips leaving the cut. If the sound changes to squeal, stop and review the setup. If the bit turns blue, the edge has been overheated.
A Drill Bit should be run slowly enough for the material and large enough hole size, especially when the sheet is stainless or the panel is already warm.
The idea is simple but important: let the cutting edge do the work. A quality Drill Bit should not need to be forced through thin sheet. If force is required, the edge may be dull, the point may be wrong for the material, the work may not be supported, or the speed may be too high.
A Drill Bit that needs extra force is sending useful feedback. Stop, inspect the point, clear chips, and check whether the sheet is flexing before continuing.
Use Pilot Holes and Step Bits When the Finished Hole Is Larger
Large twist bits can be aggressive at breakthrough. They also remove a wide chip, which can catch on thin material. A pilot hole gives the web of the final bit a path and reduces pushing force. For many workshop holes, drilling a pilot and then stepping to the final size is more controlled than trying the full size immediately.
A step bit is often helpful for thin sheet because it cuts one size at a time. Each step opens the hole gradually, and the wide shoulder can leave a cleaner rim when used with care. The operator still needs support, correct speed, and straight alignment. A step bit is not a cure for a loose workpiece.
When using any final-size Drill Bit, ease pressure slightly as the point is about to break through. Do not stop feeding completely, because rubbing can still heat the edge. The goal is a controlled breakthrough where the edge finishes the hole without yanking the sheet.
A Drill Bit should leave the work gradually, especially on painted or thin galvanized panels. That last moment often decides whether the edge stays round or lifts into a burr.
Clear Chips and Control Heat
Chips tell the story. Short, clean chips mean the edge is cutting. Dust, smoke, or a polished groove means the tool is rubbing. Packed chips in the flutes increase heat and can mark the hole. Back the Drill Bit out occasionally, especially in aluminum or when drilling several holes in a row.
Lubrication depends on the material and the workplace. A small amount of suitable cutting fluid can improve holes in steel and stainless. On electrical panels, painted surfaces, or food-related equipment, the team may need a cleaner method or approved fluid. The point is to reduce friction without contaminating the part.
For stainless, keep the tool sharp and avoid long rubbing contact. Work-hardening can make the next attempt much harder. If the first try only polished the surface, sharpen or change the bit before continuing. More force with a dull edge usually makes the problem worse.
A Drill Bit used on stainless should be checked more often than one used on mild steel. A small loss of sharpness can change the cut from steady chip formation to heat and rubbing.

Check the Bit Before Blaming the Material
Thin metal exposes weak tool condition quickly. Inspect the point. The two cutting lips should look even. The edge should not be chipped, rounded, blue, or loaded with aluminum. A bent shank or damaged flute can make the hole oversized. A Drill Bit that worked acceptably in wood may not be ready for clean metal work.
Point geometry matters as well. General-purpose bits can work for many small jobs, but split-point or metal-focused bits often start more accurately and reduce walking. For very thin sheet, some technicians prefer brad-point style tools only for wood and keep metal work to suitable twist or step bits. The tool should match the material.
Storage is part of tool condition. Loose bits in a drawer strike each other and lose sharpness. Keep common metal sizes separated, clean, and easy to inspect. For production work, track how many holes a bit makes before quality begins to drop.
A Drill Bit kept for metal work should not be mixed with damaged general-purpose bits. Clear storage makes it easier for a technician to choose a good edge quickly.
Troubleshooting Tearing, Grabbing, and Burrs
When the hole goes wrong, the damage pattern helps identify the cause. A raised exit burr points to breakthrough control, support, or sharpness. A triangular hole suggests grabbing or wandering. Blue color suggests heat. A ragged painted edge may come from no surface protection, too much pressure, or a dull cutting edge.
Table 2. Tearing or Grabbing Troubleshooting Checklist
| Problem seen after drilling | Likely cause | Practical correction |
|---|---|---|
| Bit grabs as it exits | Sheet flexing or feed too heavy at breakthrough | Clamp closer, add backing support, ease feed near exit |
| Hole is oval or off mark | Point wandered at the start | Center punch, pilot hole, lower side pressure |
| Large burr on exit side | Dull edge, unsupported sheet, or too much force | Sharpen or replace bit, support exit side, deburr cleanly |
| Metal turns blue or smokes | Speed too high or edge rubbing | Lower speed, use suitable fluid, clear chips |
| Aluminum sticks in flutes | Chips packing and heating | Withdraw to clear chips, use suitable lubricant |
| Stainless gets harder to drill | Rubbing caused heat and work-hardening | Use sharper bit, lower speed, firm feed |
This checklist is especially useful for repeat holes. If the first hole tears, do not drill the rest in the same way. Change one setup condition, test on scrap, and confirm the result before returning to the finished part.
A Drill Bit may not be the root cause every time, but the hole quality still reflects how the tool, support, and feed worked together. Use the first bad hole as a process warning.
Deburr Without Hiding a Bad Hole
Some burr is normal, but deburring should not be used to hide a poor drilling process. If the hole edge is folded or torn, the setup needs attention. A countersink, deburring tool, file, or reamer can clean the rim, but it should remove a small burr, not rebuild the hole.
For electrical or mechanical assemblies, burrs can cut insulation, prevent flat seating, or damage gaskets. After drilling, check both sides. If the part will be painted or sealed, clean chips and oil first. Metal chips left in enclosures can cause electrical trouble later.
A Drill Bit that makes a cleaner exit leaves less deburring work and reduces the chance of scratching the panel during cleanup. That matters when the hole will remain visible.
Deburring also protects workers. Thin sheet edges are sharp, and a newly drilled burr can cut quickly. A clean finish is not only cosmetic; it is part of safe assembly.
Match the Method to Workshop Volume
A service technician making two holes in a panel has different needs from a shop making hundreds of holes in brackets. For occasional work, careful marking, clamping, and a sharp Drill Bit may be enough. For repeated work, jigs, stops, drill press control, cutting fluid rules, and inspection gauges reduce variation.
A Drill Bit used in repeated work should be part of a controlled process, with the same pilot size, backing support, and deburring method used from one batch to the next.
If holes must be identical, make a test coupon from the same sheet. Record the drill size, speed setting, pilot size, and deburring method. A short process note saves time later. It also helps purchasing know which bit sizes wear fastest in the actual work.
For field kits, include the common sizes, a center punch, clamps where practical, a deburring tool, and replacement bits. A kit with only the bit set but no way to support the sheet is incomplete for thin metal.
A Drill Bit kit for field work should include the small sizes used for pilots as well as the final sizes used for fasteners and glands. Missing pilot sizes often lead to rougher starts.
Safety Checks Before the Drill Starts
Safety begins with the workpiece. Clamp it. Keep hands away from the rotating tool and sharp edge. Check what is behind the sheet, especially on cabinets, ducts, vehicles, or machine guards. A Drill Bit can damage wiring, tubing, insulation, or finished surfaces behind the visible panel.
Wear eye protection because thin metal chips are sharp. Remove loose jewelry and control sleeves. Use the drill straight, with stable footing and a clear path if the bit breaks through suddenly. If drilling an installed electrical enclosure, confirm isolation and follow the site’s electrical safety rules before making holes.
After the hole is finished, remove chips from the work area. Chips can scratch paint, enter equipment, or injure hands during assembly.
A Drill Bit can also leave a sharp spiral chip that stays near the workpiece. Cleaning the area is part of the drilling task, not a separate housekeeping step.
Buying and Stocking Drill Bits for Thin Metal Work
For buyers, the important question is not only unit price. It is how reliably the tool makes clean holes in the materials the team actually drills. A low-cost bit that dulls quickly can waste time through rework, burr removal, and damaged panels. A suitable Drill Bit should start accurately, hold an edge, clear chips, and fit the drills used by the team.
Stock the sizes that match real fasteners, cable glands, rivets, and mounting hardware. Keep a few spare small sizes because pilots wear and break more often. For larger holes, consider whether a step bit or another tool should sit beside the twist bits. The best kit is built around the work, not around a long list of rarely used sizes.
Bestwin‘s drill bit range can be reviewed in that practical way: by matching the bit style and size to the material, hole diameter, and support method used in the shop or field. When thin metal holes must stay neat, the final result comes from the whole setup. A sharp Drill Bit is central, but the clamp, backing support, speed, pilot hole, and deburring step all help decide whether the panel looks professional.
Final Takeaway
Thin metal does not forgive hurry. Mark the center, support the sheet, choose a sharp bit, control speed, clear chips, and reduce pressure at breakthrough. If tearing or grabbing appears, change the setup before making the next hole. Clean holes come from a stable process, not from pushing harder.
For routine work, keep a short record of the material, pilot size, final size, and bit type that performs well. That record helps teams repeat good results and replace worn tools before quality drops. With the right setup and a well-kept Drill Bit, thin metal holes can be accurate, safer to handle, and cleaner enough for visible panels, brackets, and assemblies.
A Drill Bit that is maintained for this task also reduces rework, because fewer holes need heavy deburring or repainting after drilling.










 English
  العربية
  Français
  Português
  Português do Brasil
  Italiano
  简体中文
简体中文  繁體中文
繁體中文  日本語
日本語  한국어
한국어  Deutsch
  Español
  Slovenčina
  ไทย
ไทย  Türkçe