
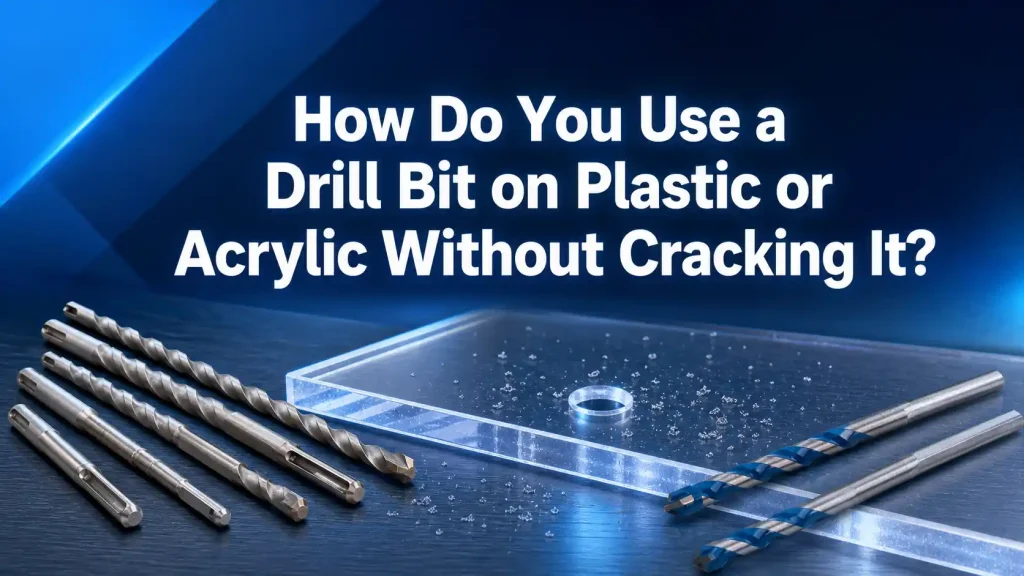
A plastic enclosure can crack in a second if the setup is wrong. The mark looks centered, the drill is sharp, and the operator is careful, yet the bit catches near breakthrough or melts a cloudy rim around the hole. Plastic and acrylic do not behave like wood or mild steel. They flex, heat quickly, and sometimes split from a small chip at the edge. A Drill Bit used on these materials should be chosen and handled for clean cutting, low heat, and steady support rather than brute force.
Quick Answer
Use a sharp Drill Bit, support the plastic firmly, start with a controlled center mark or pilot hole when needed, keep speed moderate, reduce feed pressure near breakthrough, and clear chips before they melt. For acrylic, polycarbonate, PVC sheet, and plastic boxes, the setup matters as much as the bit style.
The best result comes from preventing heat and flex. Clamp the work, support the exit side, use a bit that cuts cleanly, and stop if chips turn into powder or melted strings. A clean hole is a product of sharp edges, stable pressure, correct speed, and a patient finish.

Why Plastic Cracks or Melts During Drilling
Plastic fails differently from metal. Metal often shows heat discoloration, burrs, or a rough edge. Plastic may crack outward from the hole, melt around the rim, grab the bit, or chip on the exit side. A Drill Bit can be technically sharp and still create damage if the material flexes or overheats.
Acrylic is stiff and can crack from stress at the hole edge. Polycarbonate is tougher, but it can still grab or leave a rough exit if unsupported. PVC and many molded boxes may soften from heat and smear instead of forming clean chips. Thin plastic panels flex upward as the bit breaks through, which can pull a chip from the edge.
Heat is usually the hidden factor. Too much speed, too much pressure, a dull cutting edge, or packed chips can raise temperature quickly. The plastic softens, the flute stops clearing material, and the hole turns cloudy or rough. The operator may push harder, which makes the problem worse.
Match the Bit to the Material and Hole Size
No single Drill Bit is best for every plastic job. Small holes in soft plastic may drill cleanly with a sharp twist bit. Acrylic sheets often need a slower, more controlled cut and strong backing support. Larger holes may be better made in steps, with a pilot hole and gradual size increase. The choice should follow the material, thickness, and final hole purpose.
Table 1. Plastic and Acrylic Drilling Setup Guide
| Material or job | Setup priority | Practical note |
|---|---|---|
| Acrylic sheet | Low stress, firm backing, gentle feed | Avoid forcing the bit near the edge of the sheet. |
| Polycarbonate panel | Chip control and exit support | Tough material can still grab at breakthrough. |
| PVC box or duct | Heat control and steady feed | Stop if chips begin to smear or melt. |
| Thin plastic cover | Full backing support | Flexing is often the main cause of cracking. |
| Larger cable hole | Pilot hole and gradual enlargement | Jumping to full size can grab or split the rim. |
| Finished visible panel | Surface protection and deburring | Tape and clean backing reduce cosmetic damage. |
The Drill Bit should be clean and sharp. A worn edge rubs instead of cutting. Rubbing creates heat, and heat creates melting. If the hole must look finished, test the setup on scrap from the same material before drilling the actual panel.
Support the Work Before the Bit Touches It
Clamping is not optional for plastic. A small sheet can spin, lift, or vibrate when the bit begins to cut. A molded enclosure can flex enough to crack around the hole. Support the work on a flat board, and place backing under the exit side whenever possible. Backing gives the bit something to cut into as it breaks through, so the plastic edge is less likely to chip.
For a plastic electrical box, support the inside wall if you can reach it. For acrylic sheet, support the whole area around the hole, not only one corner. Keep the hole away from unsupported edges unless the design requires it. The closer the hole sits to an edge, the more carefully the pressure must be controlled.
Masking tape can help with marking and minor surface protection, but tape cannot replace backing. It may reduce scratching, and it gives a visible mark, but the Drill Bit still needs a stable surface. If the sheet bends while drilling, cracking can begin before the operator notices.
Start Accurately Without Creating a Stress Point
Plastic does not always need a heavy center punch. A hard punch mark can create a small crack or stress point in acrylic. For many plastic jobs, a light mark, a small pilot hole, a guide block, or careful drill alignment is safer. The goal is to stop wandering without damaging the material before drilling begins.
If a pilot hole is used, keep it straight and clean. A crooked pilot makes the larger bit cut unevenly. For larger holes, step up gradually instead of forcing one large Drill Bit through the full diameter. Each step should remove material cleanly, not scrape at high speed.
Start with the drill square to the surface. Side pressure can enlarge the entry hole or chip the surface. Let the bit begin cutting before adding pressure. Once the hole is established, keep the drill aligned so the cutting edge is not loaded unevenly.

Control Speed, Feed, and Chip Clearing
Speed and pressure decide whether plastic cuts or melts. Too much speed can heat the edge before chips leave the hole. Too much feed can grab and crack the rim. Too little feed with a dull bit can rub and melt. A good setup uses moderate speed, steady light pressure, and frequent chip clearing.
The chips tell the truth. Clean curls or small chips usually mean the Drill Bit is cutting. Powder, smoke, sticky strings, or a glossy melted rim mean the setup is too hot or the edge is rubbing. Stop, clear the flute, let the work cool, and adjust speed or pressure before continuing.
For deeper plastic, withdraw the bit occasionally to clear chips. Packed chips create friction. If the material is expensive or visible, drill partway from one side, then finish carefully from the other side when alignment allows. This can reduce exit chipping, especially on brittle sheet.
Use Pilot Holes and Step Changes Carefully
A pilot hole can make a large hole easier, but it should not be too large. If the pilot removes too much center support, the larger bit may chatter or grab. If the pilot is too small, the larger bit may still wander or push hard before cutting. The best pilot size depends on the final diameter and material thickness.
For thin acrylic or plastic panels, gradual enlargement often works better than one jump. A Drill Bit that takes a smaller bite is less likely to pull the sheet upward. The operator can also feel when the bit starts to grab and reduce pressure before the edge cracks.
Do not rush the final size. The last pass creates the visible rim. Support the exit side, slow the feed near breakthrough, and avoid leaning on the drill. If the final hole needs a tight tolerance, make a test hole first and measure the result after deburring.
Reduce Breakthrough Damage
Breakthrough is where many plastic holes fail. The bit has less material to support it, the exit side may flex, and the cutting edge can pull a chip from the rim. Backing support is the first defense. Reduced feed pressure is the second. A sharp edge is the third.
As the Drill Bit approaches the exit, ease pressure and let the bit cut slowly. If the work is thin, keep the drill square and steady. If the panel is thick enough, consider drilling from both sides after a pilot hole establishes alignment. This keeps both visible faces cleaner.
For molded boxes, watch the inner wall. Ribs, corners, and curved surfaces can make backing difficult. If the wall cannot be backed fully, use even lighter pressure and check for hidden wiring or components before drilling.
Avoid Heat Marks Around the Hole
Heat marks are common on acrylic and PVC. A cloudy edge, melted lip, or smeared chip usually means the bit rubbed instead of cutting cleanly. The cause may be speed, dullness, packed chips, or pressure that is too light for the edge to bite. A Drill Bit should remove chips, not polish the hole wall.
Cooling should be simple and appropriate for the job. In many workshop tasks, stopping often and clearing chips is enough. Some plastics tolerate a small amount of suitable lubricant or coolant, but the material and final use matter. Avoid anything that stains, weakens, or contaminates the part.
If heat marks keep appearing, change one condition at a time. Lower speed, sharpen or replace the bit, use a more suitable bit style, support the work better, or drill in smaller steps. Changing everything at once makes it harder to learn which condition solved the problem.
Troubleshoot Cracks, Grabbing, and Rough Edges
The failure pattern points toward the fix. A crack from the entry mark suggests too much marking force or edge stress. Chipping at the exit suggests poor backing or too much feed at breakthrough. Melting suggests heat. A triangular or oversized hole suggests grabbing or side pressure.
Table 2. Plastic Hole Troubleshooting Checklist
| Problem after drilling | Likely cause | Practical correction |
|---|---|---|
| Crack starts at the mark | Heavy punch or material stress | Use a lighter mark, guide block, or pilot approach. |
| Exit edge chips | No backing or heavy feed at breakthrough | Support the exit side and ease pressure. |
| Hole rim melts | Speed too high, dull edge, or packed chips | Lower speed, clear chips, use a sharper Drill Bit. |
| Bit grabs suddenly | Work flexing or final size too large at once | Clamp better and enlarge in steps. |
| Hole becomes oversized | Side pressure or wandering start | Keep the drill square and use a controlled pilot. |
| Surface scratches | Chips trapped under the work or poor handling | Clean the area and protect finished faces. |
This checklist is most useful before drilling a batch. If the first hole cracks, stop. Do not repeat the same setup across every part. Use scrap, adjust the process, and return to the finished work only after the test hole is clean.
Hand Drill or Drill Press?
A drill press gives better alignment, especially for repeat holes in sheet or panels. It controls angle and makes feed easier to manage. A hand drill is more flexible in field work, but it needs careful support and steady pressure. The right choice depends on part size, access, and how many holes must be made.
With a hand drill, brace your position and keep the tool square. Do not let the bit pull the drill forward at breakthrough. With a drill press, support the plastic fully and set the feed with care. A press can still crack acrylic if the feed is too heavy or the exit side is unsupported.
For repeat work, make a simple fixture or guide. A guide reduces wandering and helps each Drill Bit enter the same way. It also protects the operator from trying to hold a small part by hand, which is unsafe and usually less accurate.
Deburr Without Starting a Crack
Deburring plastic should be light. A sharp scraper, countersink, or deburring tool can remove a small edge, but aggressive chamfering can create stress or chatter. The goal is to remove the raised lip, not to reshape the hole. Work slowly, especially on acrylic.
Check both sides of the hole. A small burr on the inside of a box can interfere with a grommet, cable gland, switch, or fastener. Chips left inside an enclosure can scratch parts or get into mechanisms. Clean the part before final assembly.
If the hole will hold a screw, avoid over-tightening. Plastic can crack later if a screw head, washer, or fitting loads the rim too hard. A clean hole still needs the correct fastener pressure.
Check the First Hole Before Making the Batch
For repeated plastic panels, the first hole is the inspection sample. Look at the entry rim, exit rim, chip shape, and wall finish before drilling the rest. A Drill Bit that leaves a clean entry but chipped exit needs better backing or lower breakthrough pressure. A Drill Bit that leaves a cloudy wall is rubbing too hot. A Drill Bit that pulls itself forward is taking too aggressive a bite for that material.
Record the setup that works. Note the material, thickness, pilot size, final size, support method, and drill speed. The basic drill bit shape may be familiar, but the best result still depends on how that Drill Bit is used in a specific plastic. If a different operator repeats the work later, a short note prevents random changes in pressure or speed. The Drill Bit then becomes part of a controlled process instead of a guess.
Safety Checks Before Drilling Plastic
Plastic chips can be sharp and hot. Wear eye protection. Clamp the work. Keep hands away from the rotating bit and from the exit side. Check behind the panel before drilling, especially on installed enclosures, vehicle trim, machine covers, or equipment housings.
Dust and fumes should be controlled. If the plastic smells strongly, smokes, or melts, stop and correct the heat problem. Keep the work area clean because plastic chips can slide under a sheet and scratch the finished face.
Do not hold small plastic pieces by hand. The Drill Bit can grab and spin the part. A small clamp, soft jaw, or backing block is faster and safer than trying to grip a slippery piece during breakthrough.

Buying and Maintaining Drill Bits for Plastic Work
For buyers and workshop leads, the useful question is how often the team drills plastic and what quality the hole needs. Occasional rough holes in a hidden bracket may only need a sharp general-purpose Drill Bit and good support. Visible acrylic panels, electronic boxes, display parts, and cable gland holes need a more controlled setup and a well-kept Drill Bit set.
Keep common sizes separated and clean. Replace or sharpen bits that rub instead of cut. Store bits so cutting edges do not strike each other. A damaged Drill Bit can ruin plastic quickly because the material gives little warning before it cracks.
Track the combinations that work: material, thickness, pilot size, final size, drill speed, backing method, and deburring tool. A short shop note prevents each operator from rediscovering the same settings.
Final Takeaway
Plastic and acrylic drilling is a control problem. Support the material, start accurately, keep heat low, clear chips, reduce pressure at breakthrough, and deburr lightly. If the hole cracks or melts, adjust the setup before making the next hole.
Bestwin drill bit options can be reviewed by matching the bit style to the material, hole size, and finish requirement rather than choosing by diameter alone. A sharp Drill Bit is central, but backing support, speed, pressure, and chip clearing decide whether the final plastic hole looks clean. With the right Drill Bit and a steady process, plastic boxes, acrylic panels, and light-duty covers can be drilled without cracks, melted rims, or rough exit edges.










 English
  العربية
  Français
  Português
  Português do Brasil
  Italiano
  简体中文
简体中文  繁體中文
繁體中文  日本語
日本語  한국어
한국어  Deutsch
  Español
  Slovenčina
  ไทย
ไทย  Türkçe