
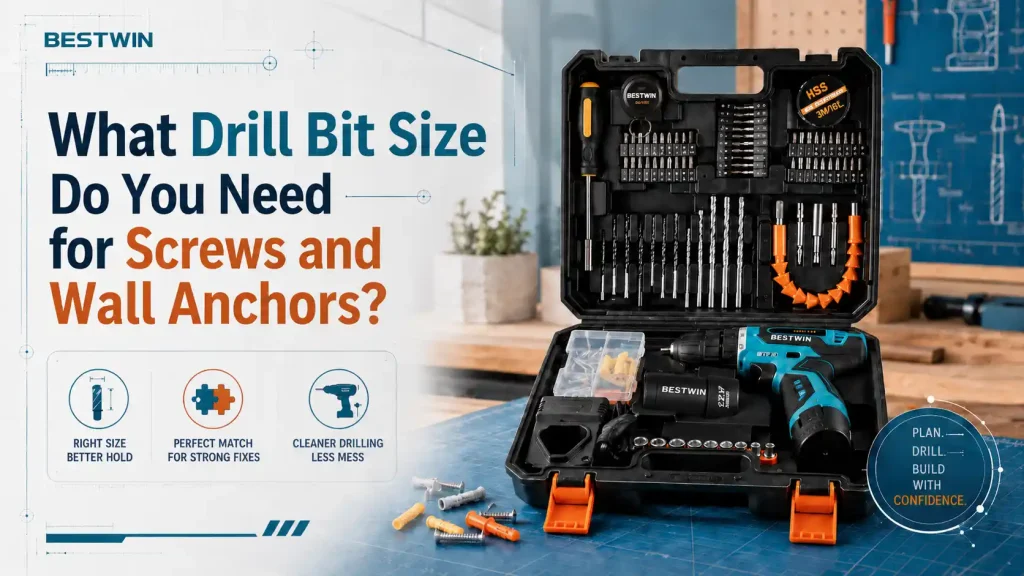
A screw that will not bite, an anchor that spins in the wall, or a board that splits at the last turn often begins with the same quiet mistake: the hole was the wrong size. The bit may look close enough in the toolbox, but a small mismatch changes how the screw thread grips, how the wall plug expands, and how cleanly the fastener seats. Choosing a Drill Bit size is not about memorizing one universal chart. It is about matching the fastener, the material, and the job tolerance before the first hole is drilled.
Quick Answer
Choose a Drill Bit size by deciding whether the hole is a pilot hole, a clearance hole, or an anchor hole. For a pilot hole, the hole should usually be close to the screw core diameter so the threads can still cut into the material. For a clearance hole, the hole should allow the screw shank to pass through the top piece without binding. For a wall anchor or plug, the hole should match the anchor maker’s stated diameter closely enough for the anchor to expand and hold.
A Drill Bit should be selected after checking the screw diameter, thread style, material hardness, anchor type, hole depth, and whether the job needs a test fit. If the fastener feels loose, the hole is probably too large. If the screw is hard to drive, the head strips, the board splits, or the anchor deforms before seating, the hole may be too small or the wrong bit style may have been used.
Why Drill Bit Size Matters More Than It Looks
Fasteners depend on controlled contact. A wood screw needs enough material for the threads to grip, but not so much that the screw splits the wood. A machine screw may need a clearance hole through one part and a threaded hole or nut on the other side. A wall anchor needs a hole that lets the sleeve enter cleanly while still leaving enough resistance for expansion.
The Drill Bit is the tool that creates that contact. If the bit is too large, the screw threads have less material to hold. If it is too small, driving torque rises and the material may crack. If the bit is dull, bent, or mismatched to the material, the hole may become oversized even when the diameter printed on the bit looks correct.
Sizing is also affected by material. Soft pine compresses differently from hardwood. MDF behaves differently from plywood. Brick, block, concrete, drywall, tile, and metal each change the way a hole forms. Good sizing begins with the fastener, but it is confirmed by the material.
The Drill Bit should also be checked as a real cutting tool, not only as a number stamped on the shank. A sharp Drill Bit cuts closer to its stated diameter, while a bent or dull Drill Bit can wobble and leave a hole that is larger than expected. That is why sizing and tool condition belong in the same check.
Know the Three Common Hole Types
Most size decisions become easier when the hole type is clear. A pilot hole guides a screw and reduces splitting while still giving the threads material to cut. A clearance hole lets the screw pass through one part so it can pull a second part tight. An anchor hole is sized for a plug, sleeve, wedge, or other anchor body that expands or locks in place.
These holes may appear in the same job. A cabinet installer may drill a clearance hole through a bracket and an anchor hole into masonry. A carpenter may drill a clearance hole through the top board and a pilot hole into the lower board. A repair technician may need a pilot hole in metal before tapping or fastening.
| Hole type | Typical purpose | How the Drill Bit size is chosen |
|---|---|---|
| Pilot hole | Guides a screw and reduces splitting | Close to the screw core diameter, adjusted for material hardness |
| Clearance hole | Lets the screw pass through the top part | Slightly larger than the screw shank or outside thread diameter |
| Anchor hole | Holds a wall plug, sleeve, or masonry anchor | Matches the anchor body diameter and depth requirement |
| Counterbore or countersink preparation | Gives the head or plug room to sit correctly | Uses a separate bit or cutter matched to the head style |
| Test hole | Confirms fit before visible work | Uses scrap or hidden material before final drilling |
The table is a guide to decision-making, not a replacement for fastener instructions. If an anchor package gives a size, start there. If the material is unusual, test before drilling the visible surface.
Pilot Holes for Wood Screws
Wood screws need thread engagement. A pilot hole that is too large removes the wood that the threads need. A pilot hole that is too small makes the screw act like a wedge, which can split the board or strip the head. The right size is usually close to the screw’s core diameter, not the outside thread diameter.
Softwood often tolerates a slightly smaller pilot because it compresses. Hardwood needs more care because it resists the screw and is more likely to split. Near board edges, near the end grain, or in thin stock, a pilot hole becomes more important. Long screws also need careful pilots because driving torque rises with depth.
The best field method is simple. Hold the Drill Bit in front of the screw. The bit should hide most of the solid core while the threads remain visible. That visual check is not perfect, but it helps prevent obvious mistakes when a chart is not nearby. If the Drill Bit hides the threads completely, the pilot is likely too large for normal wood screw holding.
Clearance Holes When Parts Must Pull Together
A clearance hole is larger than a pilot hole because the screw should not bite into the top piece. It should pass through that piece and pull it tight against the lower piece. If the top piece is not cleared, the screw may hold both parts apart, creating a gap even though the head feels tight.
Furniture assembly, brackets, hinges, panels, and machine guards often need this distinction. The top part gets a clearance hole. The lower part gets a pilot hole or threaded receiving feature. When the screw tightens, it clamps the parts together instead of fighting thread engagement in both pieces.
For a clearance hole, choose a Drill Bit that is slightly larger than the screw shank or thread outside diameter, depending on the fit required. Loose clearance makes assembly easier but may reduce positioning accuracy. Close clearance improves location but needs more careful drilling. When parts need to align precisely, test the Drill Bit size on scrap so the screw slides cleanly without letting the bracket drift.
Wall Anchors and Masonry Plugs
Wall anchors are less forgiving because the hole has to fit the anchor body. A plastic wall plug needs enough friction to stay in the hole while the screw expands it. A sleeve anchor or other masonry anchor may need a specific diameter and depth to work correctly. If the hole is oversized, the anchor may spin or pull out. If it is undersized, the anchor may deform before seating.
Drywall anchors, plastic plugs, concrete screws, expansion anchors, hollow-wall anchors, and sleeve anchors can all use different sizing rules. Read the anchor size first. Then choose the Drill Bit type for the material: masonry bit for brick or concrete, suitable bit for tile, and the right approach for drywall, block, or plaster.
Depth matters too. Dust at the bottom of a masonry hole can stop the anchor from seating fully. A hole that is too shallow can make the screw bottom out. A hole that is too deep may still work for some anchors but can hide dust and reduce control. Clear the hole according to the anchor requirements before final installation. The Drill Bit should reach the required depth without being forced sideways, because side pressure can widen the mouth of the hole.
Screw and Anchor Size Comparison
The following table shows practical sizing logic for common field situations. Always confirm critical work against the fastener or anchor instructions, especially for structural or safety-related fastening.
| Job situation | Sizing logic | Fit check before final work |
|---|---|---|
| Wood screw in softwood | Pilot slightly smaller than the screw core | Screw should drive without splitting and still grip firmly |
| Wood screw in hardwood | Pilot closer to the core diameter | Torque should feel controlled, not forced |
| Top board in a clamped joint | Clearance hole through the top board | Screw should slide through the top piece and pull lower piece tight |
| Plastic wall plug | Hole matches plug diameter | Plug should tap in snugly without crushing |
| Masonry anchor | Hole matches anchor specification | Anchor should seat to depth and resist spinning |
| Metal bracket with screw or bolt | Clearance follows screw or bolt outside diameter | Fastener passes through cleanly without excessive play |
This kind of comparison prevents one common mistake: using the same hole size for every layer. A single screw may need different hole behavior in different materials.
Material Changes the Right Size
Softwood can close slightly around a screw. Hardwood holds shape more firmly and may split if the pilot is too small. MDF and particle board can crumble if the hole is rough or if the screw is driven too close to an edge. Plywood may chip at the surface. Metal does not compress like wood, so clearance and pilot sizes must be more exact.
Masonry creates another set of problems. Brick and concrete produce dust that can pack the hole. Hollow block may break internally. Tile may chip at the surface if the bit walks. In these materials, bit type and drilling method matter as much as diameter.
When the material is unfamiliar, use scrap, a hidden area, or a test hole. A Drill Bit that works perfectly in pine may be too small for oak, too aggressive for brittle plastic, or wrong for concrete. Testing is faster than repairing a cracked board or loose anchor. If the first Drill Bit choice feels wrong, change size or style before drilling the visible location.
Match the Bit Style to the Material
Diameter is only one part of the decision. A twist bit, brad point bit, auger bit, masonry bit, hammer bit, step bit, and tile bit can all make holes, but they do not start, cut, clear chips, or finish the same way. The wrong style can make a correctly sized hole behave like the wrong size.
A brad point bit can help locate clean holes in wood. A masonry bit or hammer bit is made for concrete and brick when the tool mode matches the task. A step bit can be useful in sheet metal because it reduces grabbing and creates controlled diameters. A tile bit needs a careful start and low pressure to avoid cracking.
The basic rule is to match the Drill Bit to the material before worrying about small size adjustments. If the bit cannot cut cleanly, the hole may become tapered, rough, burnt, chipped, or oversized.

Check the Fastener, Not Only the Number
Two screws with the same nominal size can behave differently. Thread depth, shank design, point type, material, and coating affect how the screw enters. A coarse wood screw may need a different pilot from a fine-thread screw. A self-drilling screw changes the process again. A drywall screw used in the wrong material may give misleading results even if the pilot hole looks reasonable.
Look at the screw body. Compare the bit to the core and the outside thread. For clearance holes, compare the bit to the outside thread or shank. For pilot holes, compare it to the core. For anchors, compare it to the anchor body, not the screw that expands the anchor.
This is also where an external reference to a general drill bit can be useful for understanding how cutting edges and flutes remove material, but the final sizing decision still belongs to the fastener, material, and fit test in front of you.
Avoid Oversized Holes
An oversized hole is one of the hardest mistakes to hide. In wood, the screw may spin without tightening. In drywall, the anchor may pull out. In masonry, a plug may not expand enough to grip. In metal, a bolt may have too much play and allow the part to shift.
Oversized holes can come from choosing a Drill Bit that is too large, using a dull bit that wobbles, drilling at an angle, letting the chuck slip, or forcing the bit through unsupported material. The printed diameter may be correct while the actual hole becomes larger because the tool setup is unstable.
If a hole is oversized, choose a proper repair rather than pretending it will hold. In wood, a plug or larger fastener may be needed. In drywall, a different anchor style may solve the problem. In masonry, a larger anchor may work if edge distance and load allow it. For critical fastening, redo the hole according to the job requirement.
Avoid Undersized Holes
An undersized hole can feel strong at first because the screw resists turning. That resistance can be a warning. The head may strip, the screw may snap, the board may split, the anchor may mushroom, or the material may crack around the hole. More force does not mean better holding power.
If driving torque climbs suddenly, stop. Remove the screw and check the pilot size, depth, and chip clearance. In hardwood, a slightly larger pilot may be needed. In masonry, the hole may be too shallow or dusty. In metal, the Drill Bit may not have created a clean clearance path.
A proper hole lets the fastener seat without abuse. The Drill Bit should prepare the material so the screw or anchor can do its job, not so the installer has to overpower the material.
Use Depth Control
Diameter is not the only size. Hole depth matters for screws and anchors. A pilot hole that is too shallow makes the screw force its way through the last section of material. An anchor hole that is too shallow prevents the anchor from seating. A clearance hole that does not pass fully through the top piece can still cause parts to separate.
Use tape on the Drill Bit, a depth stop, or a marked guide when depth matters. For wall anchors, include the anchor length and any extra dust-clearance depth recommended by the anchor instructions. For screws, make the pilot deep enough for the threaded portion that enters the lower material.
Depth control is especially important near finished surfaces, cabinet panels, tile, and thin material. Drilling too deep can damage hidden wiring, pipes, or the visible opposite side. The right Drill Bit size should be paired with the right depth limit.
Test Fit Before the Visible Hole
When the finish matters, test first. Use scrap from the same material, a hidden area, or a sample block. Drill the pilot or anchor hole, drive the fastener, and check the result. The screw should seat cleanly. The material should not split. The anchor should not spin. The head should sit as intended.
Testing is also useful when the fastener package gives a size but the job material is unusual. Old brick, brittle plaster, dense hardwood, imported screws, coated fasteners, and layered panels can behave differently from the simple label. A short test keeps the real work clean.
If the test fit is too tight, increase the hole slightly. If it is loose, reduce the Drill Bit size or change anchor style. Do not make large jumps. Small changes often solve the fit while preserving holding strength.
Field Checklist for Screw and Anchor Holes
Use this checklist when the hole must hold reliably and look clean.
- Confirm whether the hole is a pilot, clearance, or anchor hole.
- Match the Drill Bit style to wood, metal, masonry, tile, plastic, or drywall.
- Compare the bit to the screw core for pilot holes.
- Compare the bit to the screw outside diameter or shank for clearance holes.
- Match anchor holes to the anchor body and required depth.
- Clamp or support the workpiece before drilling.
- Start slowly so the bit does not walk.
- Clear chips or dust, especially in deep or masonry holes.
- Test fit in scrap or a hidden area when the material is unfamiliar.
- Stop if the screw strips, the anchor spins, or the material cracks.
A checklist is not a delay. It is a way to catch the wrong assumption before the surface is marked.
Where Bestwin Products Fit Naturally
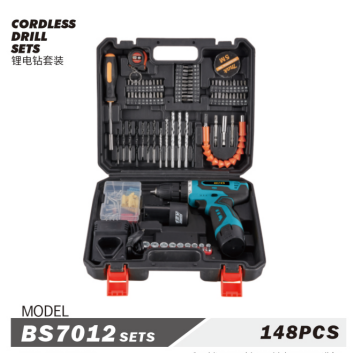
For screw and anchor work, the useful tool choice begins with the material and the required fit. Wood drilling may need a clean-starting bit. Masonry anchors need a bit that can cut brick or concrete cleanly. Mixed repair work benefits from having organized sizes so the installer can choose a pilot, clearance, or anchor hole deliberately.
Bestwin supplies drill bits, hammer bits, and drilling tool sets for common workshop and installation tasks. A Drill Bit should be selected because it gives the screw or anchor the correct fit in the material, not only because it looks close to the fastener diameter.
Final Takeaway
The right Drill Bit size depends on the hole’s job. Pilot holes guide screws and protect the material. Clearance holes let parts clamp together. Anchor holes must match the anchor body and depth. Material hardness, bit style, tool condition, and test fits all influence the final choice.
Before drilling visible work, compare the Drill Bit to the fastener, confirm the hole type, and make a test hole when the material is uncertain. That habit keeps screws from stripping, anchors from spinning, boards from splitting, and the Drill Bit from being blamed for a sizing decision that was made too quickly.










 English
  العربية
  Français
  Português
  Português do Brasil
  Italiano
  简体中文
简体中文  繁體中文
繁體中文  日本語
日本語  한국어
한국어  Deutsch
  Español
  Slovenčina
  ไทย
ไทย  Türkçe