
Problem Scenario
A broken bit usually surprises people at the worst moment: the hole is nearly finished, the workpiece is already marked, and the operator feels a sudden snap instead of a clean cut. In a workshop, on a job site, or during a repair, that small break can waste time, damage the part, or leave a hard fragment stuck in the hole. The cause is rarely just “bad luck.” Most breakage comes from a Drill Bit being asked to cut with the wrong speed, pressure, angle, material match, or chip-clearing rhythm.
Quick Answer
Main Causes
A Drill Bit breaks when cutting force, heat, side load, or vibration becomes stronger than the bit can handle. The most common causes are using the wrong bit for the material, running too fast, pushing too hard, feeding too lightly until the edge rubs, drilling at an angle, failing to clear chips, skipping a pilot hole, or using a worn chuck that lets the bit wobble.
Prevention Method
To prevent breakage, match the Drill Bit to the material, start straight, use controlled speed, feed steadily, clear chips during deep holes, clamp the workpiece, and stop when the bit squeals, bends, overheats, or stops making clean chips. A sharp Drill Bit should cut with a stable sound and visible chip movement. If the setup feels like forcing, grinding, or twisting, pause before the bit snaps.

Why Drill Bit Breakage Happens
Cutting Force and Bending Risk
A Drill Bit is a cutting tool, but it is also a narrow rotating shaft. That shape makes it useful for reaching into material, yet it also means the bit does not like bending, sudden grabbing, or uneven load. When the cutting edges are working properly, most force moves along the length of the bit. When the bit is tilted, clogged, dull, overheated, or trapped, force begins to bend or twist it.
Small bits break more easily because they have less strength across the diameter. Long bits break more easily because they flex. Hard materials raise cutting load. Deep holes trap chips. Hand drilling adds another risk because the operator must hold alignment while the bit is rotating. A Drill Bit may survive one weak condition, but several weak conditions together can break it quickly.
Warning Signs Before Failure
The useful habit is to think of breakage as a process. The bit usually gives warnings before it fails. It may squeal, wander, overheat, produce powder instead of chips, wobble, slow suddenly, or pull the tool forward. Catching those warnings protects the bit and the workpiece.
Match the Drill Bit to the Material
Correct Bit Style
The first prevention step is choosing the correct bit style. A Drill Bit that works in softwood may fail in stainless steel. A masonry bit is not a metal bit. A wood auger is not meant to be forced through steel. The diameter may match the drawing, but the cutting geometry may not match the job.
Material Behavior and Heat Risk
Material also changes the amount of heat and pressure needed. Mild steel needs a sharp metal bit, suitable speed, and often cutting fluid. Stainless steel needs even more control because rubbing can harden the surface. Hardwood needs sharp edges and chip clearing. Concrete needs a masonry or hammer bit and the correct impact action. Plastic needs care because heat can melt the material and grab the bit.
Table 1. Drill Bit Choice by Material and Breakage Risk
| Material or job | Better Drill Bit choice | Breakage risk to watch |
| Softwood and hardwood | Brad point, auger, spur, or suitable twist bit | Splitting, chip packing, exit-side grabbing |
| Mild steel | Sharp HSS, cobalt, or suitable metal bit | Overheating, dull edges, too much speed |
| Stainless steel | Cobalt or suitable metal bit | Rubbing, work hardening, edge damage |
| Masonry and concrete | Masonry bit or hammer bit | Wrong mode, side load, dust packing |
| Plastic sheet | Sharp controlled bit suited to plastic | Melting, grabbing, cracking |
| Thin sheet metal | Step bit or supported metal bit | Snagging at breakthrough |
The table is not a replacement for the tool instructions, but it shows the pattern. A Drill Bit breaks less often when its shape, material, and cutting edge match the material in front of it.
Control Speed Before Heat Builds
Heat From Excessive Speed
Speed is one of the most common reasons a Drill Bit breaks. Too much speed creates heat and can make the cutting edge rub instead of cut. Heat weakens the edge, changes the way chips form, and makes the operator push harder. Once the edge is damaged, breakage becomes more likely.
Speed by Diameter and Material
Diameter matters. Larger bits generally need slower rotational speed than smaller bits. Harder materials need more control than soft materials. A small bit in wood may run quickly, while a larger Drill Bit in metal needs a slower, steadier approach. If the bit is smoking, turning blue, squealing, or making dust instead of chips, the setup is not cutting cleanly.
Breakthrough Control
Speed should also be reduced near breakthrough. When the bit exits the far side, it can grab suddenly. This is common in sheet metal, plastic, and thin material. Supporting the back side and easing pressure near the exit can keep the Drill Bit from catching and twisting.
Use Feed Pressure That Cuts Instead of Bends
Balanced Feed Pressure
Feed pressure is the push that moves the bit into the material. Too little feed can be a problem because the Drill Bit rubs, heats, and dulls. Too much feed can bend the bit, overload the cutting edge, or cause the drill to grab. The right feed keeps the edge cutting steadily without forcing the tool.
Stop and Inspect Before Forcing
Operators often push harder when progress slows. That can break the bit if the real cause is dullness, wrong speed, chip packing, or poor alignment. A better response is to stop, inspect the hole, check the bit, clear chips, and restart with better control. If a Drill Bit needs extreme force to move forward, it is probably not cutting correctly.
Avoid Side Pressure
Feed should also stay in line with the bit. Side pressure is dangerous. Pulling the drill sideways to correct a drifting hole, using the bit like a lever, or changing angle while deep in the hole can snap the bit. A Drill Bit is made to cut forward, not to pry.
Keep the Drill Straight From the Start
Alignment and Edge Load
Alignment is more than appearance. If the drill starts at an angle, one cutting edge takes more load than the other. The bit can flex, rub on one side of the hole, and bind as it goes deeper. A long Drill Bit magnifies that problem because a small angle at the chuck becomes a larger movement at the tip.
Marking, Guides, and Fixtures
Start by marking the hole clearly. Use a center punch in metal when suitable. Use a guide block, jig, drill press, or fixture when the hole must be accurate. In hand drilling, check alignment from the front and side before the bit is deep. Once the hole is established, do not try to bend the bit back toward the correct position.
Correcting a Wrong Start
If the hole has already started wrong, stop and decide whether to restart, guide, or rework the part. Forcing a Drill Bit sideways inside a wrong hole is one of the fastest ways to break it.

Use Pilot Holes and Step Drilling
Pilot Hole Purpose
Large holes place more load on the bit. A pilot hole reduces that load and helps keep the final bit centered. In metal, hardwood, and thick plastic, drilling a smaller hole first can make the final cut cleaner and safer. The pilot should be straight and correctly sized. If the pilot is crooked, the final hole may follow it.
Step Drilling for Load Reduction
Step drilling means increasing the hole size in stages. This is useful when the final diameter is large or when the material is hard. It reduces cutting force and helps the operator feel problems before the final bit is under full load. A Drill Bit is less likely to break when each step removes a controlled amount of material.
When Pilot Holes Are Useful
Pilot holes are not always needed, but they are useful when accuracy, depth, hardness, or diameter makes the job demanding. They are also helpful when using a hand drill because they reduce the amount of torque needed at the start.
Clear Chips During Deep Holes
Why Chips Matter
Chips are not waste only. They carry heat away from the cutting edge. When chips stay packed in the flutes, they trap heat and increase friction. The Drill Bit may begin to bind, squeal, or stop cutting. If the operator keeps pushing, the bit can twist and break.
Deep-Hole Clearing Rhythm
Deep holes need a rhythm. Cut a short distance, withdraw the bit enough to clear chips, then continue. In metal work, add suitable fluid when the material calls for it. In wood, let the flutes clear shavings instead of forcing the bit through a packed hole. In masonry, clear dust so the tip can keep breaking material.
Blind Hole Risk
This is especially important for blind holes where chips have nowhere to exit. A Drill Bit can look sharp and still break if the hole becomes packed around it.
Clamp the Workpiece and Support the Exit
Workpiece Stability
A moving workpiece can break a bit even when the bit is correct. If the material vibrates, lifts, rolls, or spins, the Drill Bit sees changing force. That can chip the edge, bend the bit, or trap it in the hole. Clamping is part of cutting quality, not only safety.
Exit-Side and Shape Support
Thin sheet needs backing support. Pipe or round stock needs a V-block or fixture. Small parts should not be held loosely by hand. Wood near an edge may split if unsupported. A bracket or panel can grab the bit as it breaks through. The exit side deserves attention because that is where sudden grabbing often happens.
Reduce Pressure at the End
When drilling through material, reduce pressure near the end. Let the bit finish cutting instead of punching through. A Drill Bit that breaks at breakthrough is often reacting to a sudden grab, not to the earlier part of the hole.
Check the Chuck, Shank, and Tool Mode
Tool Condition Check
Sometimes the Drill Bit is blamed for a tool problem. A worn chuck, dirty jaws, bent shank, wrong mode, or weak battery can create wobble and uneven load. Wobble makes the tip trace a circle instead of cutting on center. That enlarges the hole, heats the bit, and increases breakage risk.
Chuck and Shank Seating
Seat the shank correctly. Tighten the chuck evenly. For keyed chucks, use the correct tightening method. For quick chucks, confirm the bit is straight and cannot slip. Clean oil, dust, or chips from the shank. If the bit spins in the chuck, stop immediately because both the shank and chuck can be damaged.
Correct Drilling Mode
Use the right tool mode. Hammer mode belongs to masonry tasks that call for it, not normal wood or metal drilling. High torque settings can also cause sudden grabs in some jobs. A Drill Bit works best when the tool, mode, chuck, and material are all matched.
Read the Chips and Sound
Chip and Sound Feedback
Good drilling gives feedback. In metal, the chips should be formed and consistent for the job. In wood, shavings or chips should leave the hole without burning. In plastic, the material should cut cleanly instead of melting. In masonry, dust should clear and the tool should advance without being forced sideways. The broader drilling process always depends on cutting action, chip movement, and tool control.
Signals That Require Stopping
If the sound changes from cutting to squealing, the Drill Bit may be rubbing. If chips become powder, the edge may be dull. If the tool suddenly slows, the bit may be binding. If the bit bends visibly, stop. These signs are not minor details. They are early warnings.
Clean Holes Over Fast Holes
Operators who read the cut can prevent most breakage. The goal is not to finish every hole quickly. The goal is to finish cleanly without damaging the bit, tool, or workpiece.
First Hole as a Setup Check
This feedback is especially useful when several people share the same drill or when the job moves between materials during the day. A maintenance team might drill mild steel in the morning, wood framing at noon, and plastic housings in the afternoon. If every task is handled with the same speed and pressure, the Drill Bit is exposed to avoidable stress. A simple habit helps: treat the first hole as a setup check. Watch how the chips form, feel whether the tool pulls straight, and inspect the hole wall before repeating the process. The first hole often tells you whether the remaining holes will be clean or whether the method needs a small correction.
Troubleshooting a Drill Bit That Keeps Breaking
Systematic Troubleshooting
Repeated breakage means the setup needs a systematic check. Do not keep replacing bits without changing the cause. Use a simple order so each possible issue is tested.
Table 2. Troubleshooting Repeated Drill Bit Breakage
| Symptom | Likely cause | What to change |
| Breaks near the tip | Wrong bit, too much heat, hard surface | Use a suitable Drill Bit, lower speed, add fluid if needed |
| Breaks near the shank | Chuck wobble, side load, poor seating | Reseat the bit, check chuck runout, keep tool straight |
| Breaks at breakthrough | Snagging, unsupported exit, too much pressure | Support the back side and reduce pressure near exit |
| Breaks in deep holes | Chip packing, heat, no withdrawal rhythm | Clear chips more often and drill in stages |
| Breaks small diameters often | Side pressure, high speed, hand movement | Use a guide, lighter feed, and better alignment |
| Breaks only in one material | Wrong geometry or material grade | Match the bit type to the workpiece |
How to Use the Failure Pattern
This kind of table helps teams avoid guessing. If the Drill Bit breaks in the same way every time, the failure pattern is telling you where to look.
When to Replace the Bit
Replacement Warning Signs
A damaged Drill Bit should not be saved for important work. Rounded cutting lips, chipped edges, blue discoloration, bent shanks, cracked tips, or repeated slipping are signs that replacement is safer than pushing through another hole. A dull bit creates heat and force, and both raise breakage risk.
Sharpening Limits
Some bits can be sharpened when the geometry and material allow it. Sharpening must be even. If the point is uneven, one cutting edge works harder and the bit may wander or bind. For small bits, coated bits, or badly damaged bits, replacement is often the better choice.
Storage Protection
Storage matters too. Bits thrown loose in a box can damage each other. Keep sizes separated and keep sharp edges protected. A Drill Bit that starts the job already chipped is much more likely to fail under load.
Where Bestwin Products Fit Naturally
Selection by Job Conditions
For breakage prevention, the useful choice begins with the job: material, hole size, depth, tool type, and accuracy requirement. A wood auger style can help clear chips in timber. Hammer bits suit masonry tasks when used with the right tool mode. Drill sets help when operators need the correct diameter and a spare bit instead of forcing one size into every situation.
Natural Product Fit
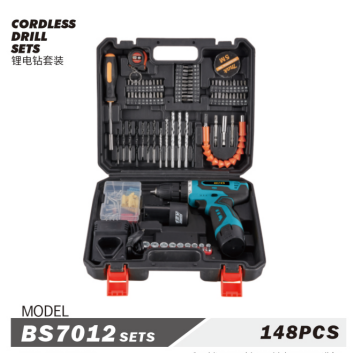
Bestwin supplies drill bits, hammer bits, wood auger bits, and drilling tool sets for common workshop and installation tasks. A Drill Bit should be selected because it can cut the material cleanly under the planned conditions, not only because the diameter matches the mark.
Final Takeaway
Main Prevention Summary
A Drill Bit usually breaks because several small problems combine: wrong bit type, high speed, poor feed, side load, chip packing, weak clamping, or tool wobble. The prevention steps are simple but important. Match the bit to the material, start straight, control speed, feed steadily, clear chips, support the workpiece, and stop when the cut gives warning signs.
Final Practical Reminder
When drilling is treated as a controlled cutting process instead of a force test, bits last longer and holes come out cleaner. A good Drill Bit still needs the right setup around it. That setup is what keeps the bit cutting instead of bending, binding, and snapping.










 English
  العربية
  Français
  Português
  Português do Brasil
  Italiano
  简体中文
简体中文  繁體中文
繁體中文  日本語
日本語  한국어
한국어  Deutsch
  Español
  Slovenčina
  ไทย
ไทย  Türkçe