
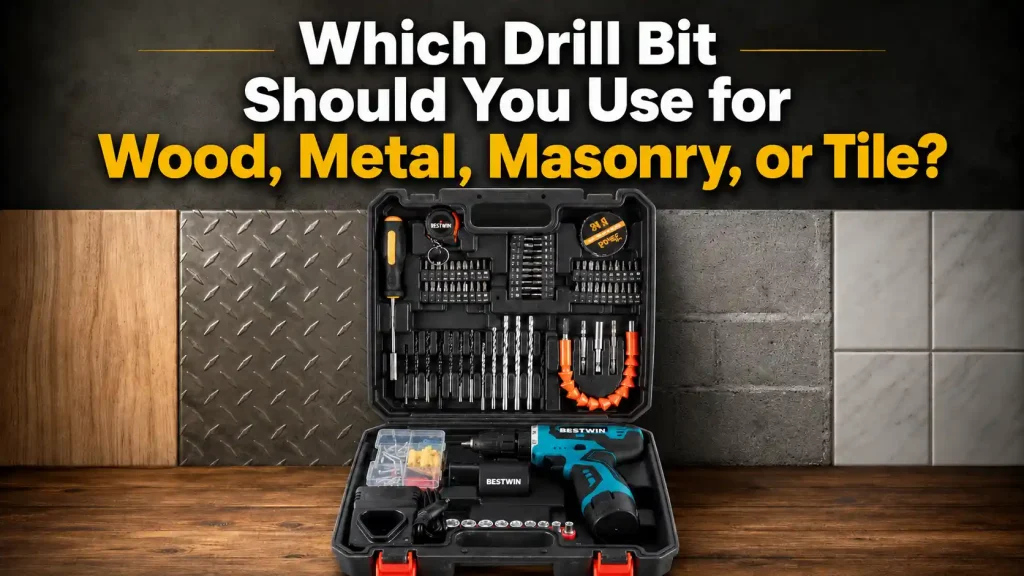
A clean hole starts before the drill touches the surface. The installer looks at wood, metal, brick, tile, or plastic and reaches into the case for a bit that seems close enough. Sometimes it works. Sometimes the bit skates across the mark, burns the surface, chips the edge, grabs in sheet metal, or leaves an anchor hole that will not hold. Choosing the right Drill Bit for the material is a practical jobsite decision. It affects speed, accuracy, tool life, and whether the finished hole can actually do its job.
Quick Answer
Choose a Drill Bit by matching the bit style to the material, then checking size, tool mode, speed, feed pressure, chip clearing, and hole finish. Wood often needs clean-starting bits such as brad point, auger, or suitable twist bits. Metal commonly needs sharp twist bits, step bits, or hole-making tools matched to thickness. Masonry needs masonry or hammer bits. Tile and brittle surfaces need careful starting and the correct cutting profile.
A Drill Bit should be selected for the material first and the hole size second. A correct diameter does not help if the cutting edge cannot start cleanly, clear chips, or survive the work. Before drilling visible or load-bearing holes, confirm the material, use the right bit style, make a test hole when possible, and stop if heat, wandering, chipping, or poor chip formation appears.
Why Material Changes the Drill Bit Choice
Different materials fail in different ways. Wood can split, tear, or burn. Metal can overheat, harden, grab, or create oversized holes. Masonry can chip at the mouth of the hole or produce loose dust that weakens anchors. Tile can crack before the bit has started. Plastic can melt and smear. A general-purpose bit may handle some light tasks, but it will not behave the same in every surface.
The Drill Bit is the cutting tool that controls the first contact. Its point shape decides how it starts. Its cutting edges decide how it removes material. Its flutes decide how chips or dust leave the hole. Its body and tip material decide how long it survives friction and impact. When those features do not match the material, the user often compensates with more pressure, more speed, or more tool force. That usually makes the hole worse.
Good material selection is also a safety issue. A bit that grabs in sheet metal can twist the workpiece. A bit that skates on tile can damage a visible surface. A worn masonry tip can widen an anchor hole. Choosing the right Drill Bit helps the operator control the tool instead of fighting it.
Start With the Material, Then the Hole Purpose
Before choosing a bit, identify both the material and the purpose of the hole. A pilot hole for a screw is different from a clearance hole for a bolt. An anchor hole in concrete is different from a clean visible hole in a cabinet panel. A hole in thin sheet metal is different from a hole in thick steel. The material tells you what cutting style is needed. The hole purpose tells you how accurate, clean, deep, and stable the result must be.
For mixed jobs, it helps to separate the hole into layers. A bracket may need a clearance hole through metal and an anchor hole in masonry. A cabinet screw may need a clearance hole through the top piece and a pilot hole in the lower piece. A tile installation may need a surface start through tile and then a different approach for the backing material. One Drill Bit may not be the right answer for every layer.
| Material | Common bit direction | Main risk if the bit is wrong |
|---|---|---|
| Wood and plywood | Brad point, auger, spade, hole saw, or sharp twist bit | Splitting, tear-out, burning, rough exit |
| Metal sheet or bar | Twist bit, step bit, countersink, or suitable hole cutter | Grabbing, overheating, poor size control |
| Brick, block, or concrete | Masonry bit or hammer bit matched to tool mode | Chipped mouth, slow progress, loose anchor fit |
| Tile or brittle surface | Tile/glass style bit or careful masonry approach after start | Surface cracking, skating, edge chips |
| Plastic or composite | Sharp bit with controlled speed and support | Melting, smearing, oversized hole |
This table is a starting point, not a replacement for tool instructions. The same material can behave differently by thickness, hardness, coating, age, and support.
Drill Bit Choices for Wood
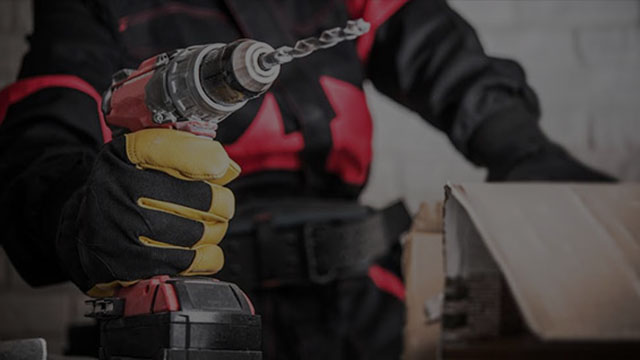
Wood drilling looks simple until the surface has to stay clean. A twist bit can make general holes, especially in softwood or rough work, but it may wander or tear fibers at the entry. A brad point bit starts more accurately because the center point locates the hole and the outside spurs cut the edge. An auger bit clears chips well in deeper holes. A spade bit can make quick rough holes. A hole saw is useful for larger diameters.
The right Drill Bit also depends on the wood. Softwood compresses and cuts easily, but it can splinter at the exit. Hardwood needs sharper edges and controlled feed. Plywood can tear along veneer layers. MDF makes fine dust and can wear edges. Treated or resinous wood can clog flutes and create heat.
Use backing material when the exit side matters. Start at a controlled speed. Clear chips in deep holes. Reduce pressure near breakthrough. A Drill Bit that is correct for wood should produce chips or shavings rather than smoke and dust. If the hole burns or the bit squeals, check speed, sharpness, and chip clearing before pushing harder.
Drill Bit Choices for Metal
Metal drilling rewards sharp edges and controlled technique. A twist Drill Bit is common for many metal holes, but it should be sharp and centered. A center punch helps prevent walking. Cutting fluid may be useful for many metal operations. Lower speed and steady feed often work better than high speed with heavy pressure. In thin sheet, a step bit can reduce grabbing and create cleaner diameter control.
Metal problems often come from heat. If the bit rubs instead of cuts, the workpiece can harden, the edge can dull, and the hole can become polished rather than cut. Blue discoloration, squealing, small powdery chips, or heavy tool load all suggest the Drill Bit is not cutting correctly or the speed and feed are wrong.
For larger holes, do not assume one pass is best. A pilot hole may help. A step-up process may be more stable. Clamp the work so it cannot spin if the bit grabs. Keep hands away from sharp chips. The correct Drill Bit for metal is not only a diameter; it is the edge shape, material, speed, feed, and support working together.
Drill Bit Choices for Masonry and Concrete
Masonry drilling depends on impact, abrasion, and dust removal. Brick, block, concrete, stone, and mortar do not cut like wood or metal. A masonry bit or hammer bit is designed to break and clear mineral material. The tool mode matters. Hammer mode may be suitable for concrete or brick, but it can damage some brittle surfaces or finishes if used too aggressively.
Anchor holes make masonry bit choice especially important. The hole must match the anchor diameter and depth. If the Drill Bit is worn, oversized, or forced at an angle, the anchor may spin, pull out, or seat poorly. Dust should be cleared according to the anchor requirement. A hole full of powder can prevent the anchor from gripping correctly.
Masonry surfaces can also be uneven. Start carefully so the bit does not wander. Keep the tool aligned. Do not use a wood bit because the diameter looks close. The carbide or masonry tip is part of the design. If the tip is chipped or worn flat, replace the bit before drilling critical anchor holes.
Drill Bit Choices for Tile, Glass, and Brittle Surfaces
Tile and glass are unforgiving because the first few seconds decide whether the surface chips or cracks. The Drill Bit must start without skating and must remove material without sudden impact. Depending on the material and hole size, a tile or glass bit, diamond-coated bit, or carefully managed masonry approach may be used. The exact method should follow the surface and tool instructions.
Start slowly and support the tool. Masking tape can sometimes help marking and initial control, but it is not a substitute for the correct bit. Avoid sudden pressure. Keep the bit cool where the method requires it. Once the surface is penetrated, the backing material may require a different approach. A tile wall over masonry is not the same as a tile over drywall or board.
The wrong Drill Bit can chip the glaze, crack the tile, or leave a hole too rough for a fixture. For visible bathroom, kitchen, or finish work, test on spare tile when possible. A slow controlled start is usually faster than repairing a cracked surface.
Drill Bit Choices for Plastic and Composite Materials
Plastic can melt, grab, or crack. A bit that works well in metal may bite too aggressively into thin plastic. A bit that is dull may create heat and smear the material. Composite panels may chip at the surface or produce abrasive dust. The right Drill Bit should cut cleanly while the tool speed and feed prevent melting.
Support the material from behind. Start with controlled pressure. Clear chips before they pack into the flutes. For thin sheet, a step bit or carefully selected twist bit may help reduce grabbing. For brittle plastic, too much pressure near breakthrough can crack the edge.
If plastic begins to melt, stop and review speed, feed, sharpness, and support. Pushing harder usually makes the edge hotter. A sharp Drill Bit and lower heat are more important than forcing the tool through the work.
Match Drill Bit Style to Hole Quality
The hole purpose decides how much accuracy and finish are needed. A rough cable pass-through hole can tolerate more tear-out than a visible cabinet hole. A wall anchor needs correct diameter and depth. A bolt clearance hole needs alignment. A countersunk screw needs a clean top edge. A hinge cup, plug, or dowel hole may need flat bottom or tight location control.
This is why one Drill Bit case often contains several styles. The user is not choosing between fancy and simple tools. The user is choosing the cutting shape that matches the job. When the job needs clean entry, use a bit that starts accurately. When the job needs deep chip clearing, use a bit that clears chips. When the job needs impact drilling, use the correct masonry or hammer bit.
| Hole requirement | Useful bit feature | Practical check |
|---|---|---|
| Accurate start on wood | Center point or spur control | The bit stays on the mark without wandering |
| Clean anchor hole in masonry | Sound carbide tip and correct diameter | Anchor seats snugly and does not spin |
| Thin metal hole | Controlled point or step profile | Bit does not grab or deform the sheet |
| Larger round opening | Hole saw or suitable cutter | Pilot stays centered and teeth clear chips |
| Finish surface hole | Sharp edge and backing support | Entry and exit edges remain clean |
Using the wrong Drill Bit style can turn the correct diameter into a poor hole. Match the cutting behavior to the result you need.
Check Speed, Feed, and Tool Mode
Even the right bit can fail if the tool settings are wrong. High speed can overheat metal. Low speed with too much pressure can tear wood. Hammer mode can help masonry but damage tile. A clogged flute can make a sharp bit behave like a dull one. Poor clamping can make metal grab or wood splinter.
Before blaming the Drill Bit, check speed, feed pressure, tool mode, chip clearing, and work support. The bit should cut, not rub. It should clear material, not pack it into the hole. It should remain aligned with the intended hole path. If the tool is fighting the user, stop and check the setup.
The general drill bit concept covers many cutting tools with different points, flutes, and materials. On the job, the useful question is narrower: does this bit style, at this speed and pressure, make the hole required in this material?

Use Test Holes When the Surface Matters
Testing is the habit that prevents visible damage. Use scrap from the same material, a hidden spot, or a sample piece. Drill at the planned speed and pressure. Check entry, exit, diameter, fastener fit, anchor fit, and surface finish. If the test hole burns, chips, melts, or wanders, change the Drill Bit style or setup before moving to the finished surface.
Test holes are especially useful for hardwood, old brick, tile, plastic sheet, coated metal, and imported fasteners. A size chart or tool label can get you close, but the material tells the final truth. Testing also helps confirm whether the bit is sharp enough.
For production or repeated installation work, a test hole can save time. Once the correct bit, speed, and depth are confirmed, the rest of the job becomes more consistent. Skipping the test often feels faster until one visible hole needs repair.
Watch the Chips and Surface Response
The material coming out of the hole gives immediate feedback. Wood should usually produce chips or shavings, not smoke and burnt powder. Metal should produce controlled chips when the bit, speed, and feed are suitable. Masonry should progress steadily with dust removal. Plastic should cut without melting. Tile should start without skating or edge cracking.
If the response changes, stop. A Drill Bit may be dull, clogged, overheated, bent, or simply wrong for the material. Check the edge and flutes. Clear chips. Let the bit cool. Confirm tool mode. Replace the bit if the tip is damaged.
Surface response also helps with anchors and fasteners. A masonry hole that becomes oversized may not hold. A wood hole with torn fibers may weaken a screw. A metal hole with burrs may prevent a part from sitting flat. The Drill Bit is finished only when the hole is fit for the part that goes into it.
Common Mistakes When Choosing a Drill Bit
The first mistake is choosing only by diameter. Diameter matters, but the material decides the cutting style. The second mistake is using a dull all-purpose bit because it is already in the drill. A worn bit may wander, overheat, and make the hole larger than expected.
The third mistake is using hammer action in the wrong surface. It can help concrete, but it can crack tile or damage finishes. The fourth mistake is drilling without support. Thin metal can grab, wood can splinter, and plastic can crack when the work moves.
The fifth mistake is ignoring the fastener or anchor. A Drill Bit that makes a visually clean hole may still be wrong if the anchor spins or the screw has poor grip. Always connect the bit choice to the final purpose of the hole.
Where Bestwin Products Fit Naturally
For workshop, installation, and repair work, the useful starting point is the material and hole purpose. A clean wood hole, a controlled metal hole, a stable masonry anchor, and a careful tile opening may need different bit styles. Keeping the right range on hand makes the decision easier and reduces the temptation to force one bit through every surface.
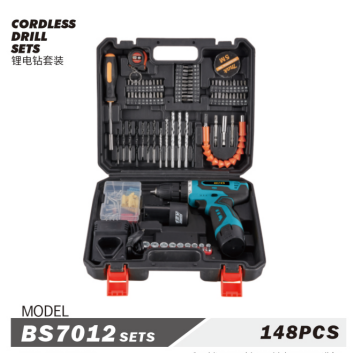
Bestwin supplies drill bits, hammer bits, chisels, and drilling tool sets for common jobsite and workshop tasks. A Drill Bit should be treated as a cutting tool matched to the material, not as a permanent accessory that can make every hole with the same pressure and speed.
Final Takeaway
The right Drill Bit is the one that matches the material, hole purpose, tool mode, speed, and finish requirement. Wood needs clean cutting and support. Metal needs sharp edges, controlled speed, and stable clamping. Masonry needs the right impact-rated tip and dust control. Tile and brittle surfaces need careful starts. Plastic needs low heat and support.
Before drilling finished work, identify the material, choose the bit style, confirm size and depth, and make a test hole when the result matters. A suitable Drill Bit protects the workpiece, reduces tool strain, and turns drilling from a guess into a controlled operation.










 English
  العربية
  Français
  Português
  Português do Brasil
  Italiano
  简体中文
简体中文  繁體中文
繁體中文  日本語
日本語  한국어
한국어  Deutsch
  Español
  Slovenčina
  ไทย
ไทย  Türkçe